
H. Valters
Ethical Penetration tester / DevSecOps / IT Solution Developer / System administrator

WHMCS In a Docker
Let’s start with a simple thing, what is WHCMS?
In my view, WHCMS is a good automated hosting client control system, that can help you run your hosting business. With this tool, you can not only automate selling your shared hosting, VPS, domain, and other hosting services but also automate billing and support. This is an ideal tool for hosting solutions. As I did research I only found 2 types of hosting billing systems and the popular one in the world is WHMCS. This is not a paid promotion or some partnership with WHMCS as I wanted Just a challenge to put WHMCS inside a Docker container, which was challenging and interesting for me. Also, this is one part of several coming posts about hosting companies and how to start your own hosting company.
WHCMS can be hosted on a Linux server running Apache2 and Nginx or also on a shared hosting server running cPanel / Plesk. But for the WHCMS to work you need an iOncube module as the PHP files of WHCMS are encoded.
As a person who thinks that Docker is a good option and a technology for the next 5-10 years making more secure and easy managing systems at the same time allowing us to cut costs and save the global environment by running several different systems isolated on less server instead of many severs.
WHMCS top features
The WHMCS itself is a very flexible solution if you want to start your own hosting and don’t want to invest a few tens of thousands to develop your own management system. As that is too much work. At the moment maybe you are thinking ou it is better to develop your own automatically billing and control system, but that is not true since you need to maintain it and keep it up to date. Economically speaking it is much cheaper to pay let’s say 18.00 $ Per month and have a system, that is maintained by someone else and always will be up to date.
With WHMCS there are some good and some bad things. I will start with bad things. The code of WHMCS is encrypted by iOncube and you cannot do any changes to it, but I think it is not the worst thing as some unprofessional person could open the code make some changes get hacked, and blame the WHMCS for his own mistakes. But there is also a silver lining WHMCS works with modules and hooks and they have good documentation from what you can create your own modules and integrate them into the system without making the base system vulnerable.
Speaking about the modules hoops the second minus that I see is many have developed their own modules and hooks and they are selling them, yes they are not so expensive ( for example Proxmox module costs 128$ which is a one-time payment ), but the issue that I’m concerned about is that the module can become abandon and the developer in future will not do any updated that might bee needed I personally would feel much safer if WHMCS would take the most popular Modules/Hooks in there hands and provide 100% guarantee updates for them.
The thing that I would suggest you consider is if you plan to use your WHMCS as an also frontpage for your services, then I would say don’t maybe use it Just for controlling your clients as it has a poor google SEO integration, therefore it is better to use a WHMCS bridge to WordPress as WordPress has good SEO plugins available so that you can get good organic traffic from google searches.
Now about pluses, the plus is that WHMCS have integrated into their system Plesk and cPanel modules, that they maintain. There are also other free modules, like reselling SSL certificates and domains using large companies therefore you can earn % from each deal. Recently I so that some VPN providers have created their modules to do a VPN resel so therefore you are not limited on what to resel or what type of services to provide to your customers. As the automation offers automatically to block and suspend client services if the client has not paid for the services or products that you offer.
The WHMCS has a good ticketing system integrated inside the CMS itself as it has the all required functions for successful client support including tracing any client complaints.
WHMCS also supports many payment method plugins that are developed and maintained by them. For example PayPal, Skrill, Stripe and also other 3-party vendors, like Conbaise and etc. The previously mentioned payment method plugins are easy to connect to the vendors with a few clicks.
To start firstly We need VPS with Docker
If you don’t have a Docker installed, then you can follow this guide and set up a reverse proxy with SSL
Once we have Docker up and running execute the following command in your Linux terminal:
docker network create -d bridge whmcs-network && docker network connect whmcs-network nginx-proxy && docker network connect whmcs-network nginx-proxy-letsencryptWith the command above we have created our internal network, as for some security reasons WHMCS wants your server or in our case container to have a static IP if for example we will redeploy the container or restart the container/server the Ip would change and it would ask you to request a new license from WHMCS ( that’s fast done, but that would be annoying ).
Now we need to see what is our New network IP address:
docker inspect network whmcs-networkIt should show you a large output message, but you need something like this ( Subnet and gateway might be different than in this example )
“Created”: “2022-01-09T16:30:20.687284879+02:00”,
“Scope”: “local”,
“Driver”: “bridge”,
“EnableIPv6”: false,
“IPAM”: {
“Driver”: “default”,
“Options”: {},
“Config”: [
{
“Subnet”: “172.29.0.0/16”,
“Gateway”: “172.29.0.1”
}
]
},
Once we have done that and all is successful now we would need to create and run a MySQL container as we will need to store our data in the database. If you for some reason already have a working Docker MySQL container, then you just need to add it to our new network.
For existing MySQL Docker containers run the following command:
docker network connect whmcs-network <your-container-name>If you don’t have MySQL installed execute the following command:
docker run --name mysql-server --net whmcs-network --restart always -p 309:3306 -e MYSQL_ROOT_PASSWORD=<your-secret-password> -d mysqlReplace <your-secret-password> with some password. I recommend around 15-25 A-Z 1-2 and specific symbols. After the installation is done execute the following command as we need to create a MySQL database, MySQL user with a secure MySQL password.
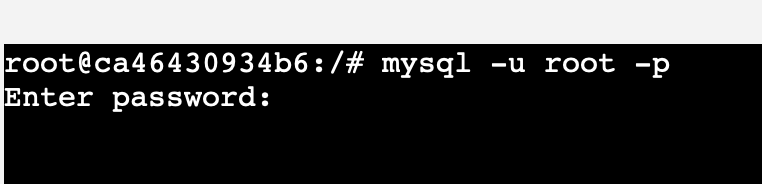
docker exec -it mysql-server bashOnce we are inside our container with the above command, let’s login to MySQL:
mysql -u root -pEnter your password:
And we are in:
Now, let’s create a database for the database name I will use whmcssystem, but you feel free to use what you want:
create database whmcssystem;Now let’s create a MySQL user, please replace supersecureu and the password to your desired secure password and username:
CREATE USER 'supersecureu'@'%' IDENTIFIED WITH mysql_native_password BY 'SuperSecurePass1234FromvVA%ters';Now we need to grant access to our new MySQL user to the newly created MySQL database, we can do that by executing:
GRANT ALL PRIVILEGES ON whmcssystem.* TO 'supersecureu'@'%';Once that is done apply the changes by executing:
flush privileges;Exit the MySQL database server by executing:
quit;Exit the Docker container, by executing:
exitNow that we have installed the Docker MySQL database server and also we have created a new user with a database, we can execute the following command below to create our WHMCS container, but before you do that read below, what you need to replace. Like for example IP based on the above output.
docker run --name whmcscontainer --net whmcs-network --ip 172.29.0.4 --restart always --publish-all -p 89:80 -p :443 --hostname=<your-domain-name> --memory="3g" --memory-reservation="2g" --memory-swap="3g" -v <location on your server were to store backups>/bck:/var/www/bck -e VIRTUAL_HOST=<your-domain-name> -e LETSENCRYPT_EMAIL=<yout-email-address> -e LETSENCRYPT_HOST=<your-domain-name> -d j90w/whmcsThe things that you need to change is the IP with your newly created network IP from the subnet.
Also were is mentioned <your-domain-name> to your domain name.
The location on your server for WHMCS important folder backups <location on your server were to store backups> ( Ex: /srv/whmcs/ )
Your e-mail address for Let’s encrypt <yout-email-address>
And we are done, we have fully running WHCMS on a Docker. Now you only need to go to http://<your-hostname-zone>/install and perform an Installation.
After the installation is done do configurations already using the WHMCS admin panel
After you finish installation, execute the following command in your Linux terminal:
docker exec -it whmcscontainer bashNow that you are in your container, remove the install folder, by executing:
rm -rf /var/www/html/instalThe CMS, that is used inside the docker container is downloaded from WHMCS.COM, and all its copyrights belong to WHMCS, INC as a product developer, maintainer, and intellectual copyright owner.
For WHMCS usage, you would need to purchase a license from https://www.whmcs.com the license is a monthly subscription, that can be canceled at any time. This article is not promoted or sponsored by WHMCS, it was created since I wanted to do some challenges and also at the same time give users the opportunity to use this software inside a docker container as all technology is fastly shifting to the Docker engine.
The WHCMS version in the container is 8.3
PHP version: 7.4 ( The largest what on 09.01.2022 WHMCS supports )
Docker container is based on Debian:latest
Apache2 is the latest version, where already Log4j fix is applied
URL To Docker hub:
That is it enjoy.