
H. Valters
Ethical Penetration tester / DevSecOps / IT Solution Developer / System administrator

How to Setup SoftEther VPN on Ubuntu 20.0 LTS

With all the COVID-19 pandemic data thieves have become more active in stealing data and also many companies would like to know more about you or what you do by adding a tracer to Smartphone/Pad applications. Of course, some people have nothing to hide, but it is more a question of principle do you want some company to collect your data and gain profit from it. Also, the VPN solution is more used for companies to protect their resources if a Company server infrastructure is protected by VPN an especially SSH ports or any other like Remote Desktop that will add one layer of coating on your network. Also, VPN is used for employees to access resources inside your company’s network, that is not meant to be accessible to other people or to communicate with different closed networks. With VPN there are unlimited options that you can use it for, also when there will be available to travel again you can use VPN to secure and encrypt your connection and browsing. If you would like to protect your data then let’s start.
To start you would need a server or VPS that is running a Ubuntu server operating system ( Now Ubuntu you can install on any PC/Laptop/Server/Virtual Server ).
- Login to your server and type:
sudo suIf you aren’t a root user it might ask you to enter a root password.
2. Let’s update repository and also os to the latest version:
apt-get update && apt-get upgrade -yWhat is SoftEther?
SoftEther VPN is one of the world’s most powerful and easy-to-use multi-protocol VPN software, made by the good folks at the University of Tsukuba, Japan. It runs on Windows, Linux, Mac, FreeBSD and Solaris and is freeware and open-source. You can use SoftEther for any personal or commercial use free of charge.
3. Download SoftEther:
Unfortunately, there is no way of getting the latest version through package managers (or even using a single URL) at the moment. Therefore you have to browse their website using a desktop browser to download the package. There are a couple of ways of dealing with this: First, browse their website on your own computer and then depending on your server configuration (OS, x86/x64, etc.) find the link to the appropriate package then use wget to download the package to your server. Alternatively, you can use a terminal-based web browser such as lynx to browse the SoftEther website and download the right package.
apt-get install lynx -y4. Now once we have Installed lynx we can use the command below to browse the SoftEther download webpage:
lynx http://www.softether-download.com/files/softether/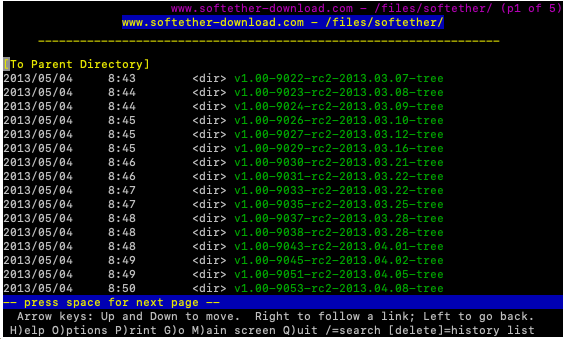
Now with your arrow keys (up & down) select the VPN version, that you want to install in this tutorial I will be selecting, the latest one “v4.34-9745-rtm-2020.04.05-tree”
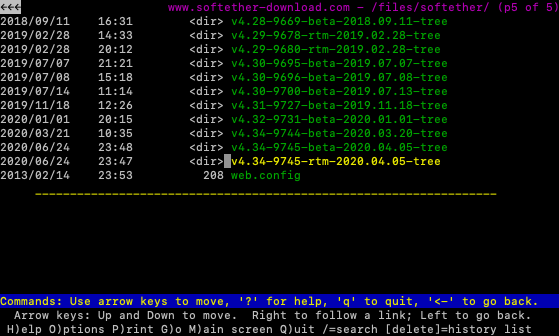
Once you have selected the version, that you would like to install ( Latest always recommended ) press enter and it will open their directory
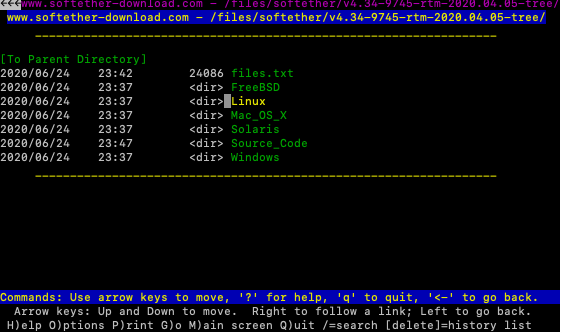
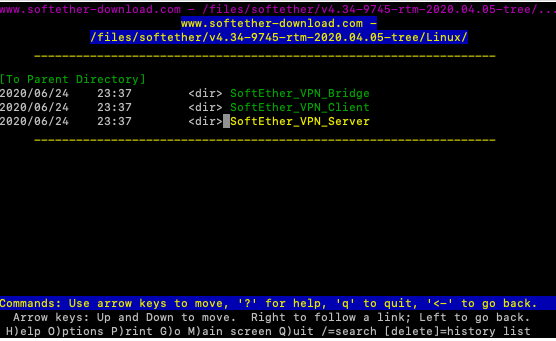
Now in the next step, let’s select “Linux” and press enter
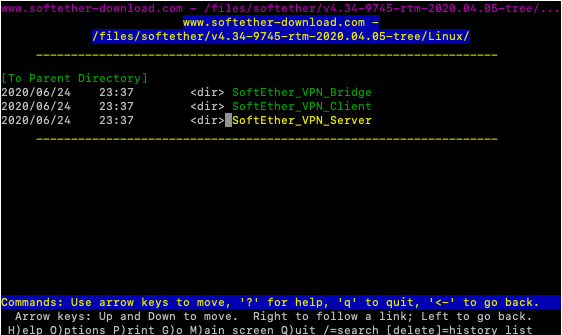
After finishing the above we now need to select “SoftEther_VPN_Server” and press enter
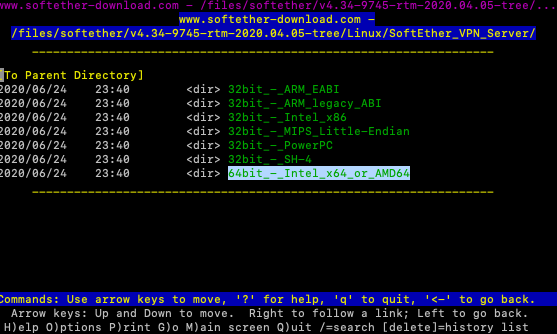
I assume, that you have a 64-Bit server so select “64bit_-_Intel_x64_or_AMD64” and press enter
Now select “SoftEther_VPN_Server” and press Enter
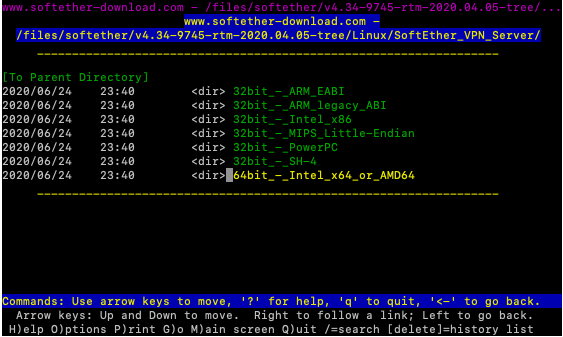
Once more select “64bit_-_Intel_x64_or_AMD64” and press enter
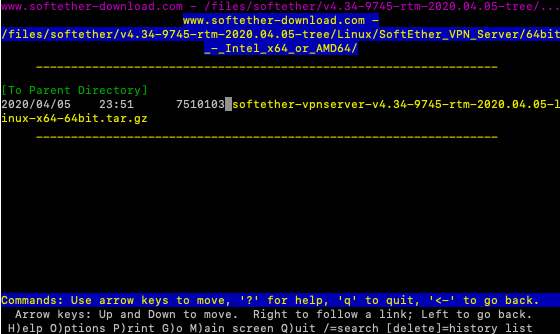
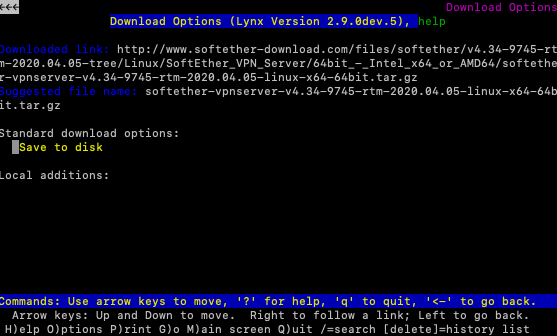
Now here is the prize, in my case latest is “softether-vpnserver-v4.34-9745-rtm-2020.04.05-l inux-x64-64bit.tar.gz”, but you might see a different version that is never when you will be installing. Once you have selected the tar file, press the D button to Download it to your device.
Once you will press the D button it will start download. It will ask you “Save to disk” you need to press enter 2 times
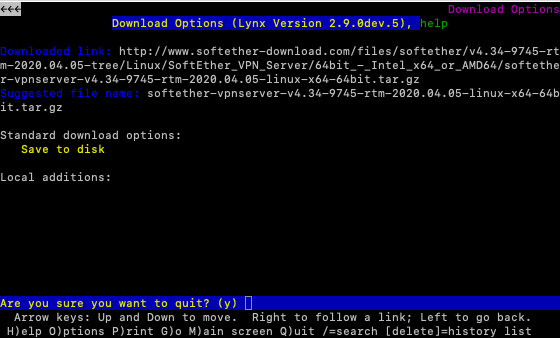
Once done press q and then y
Now we have download in my case “softether-vpnserver-v4.34-9745-rtm-2020.04.05-linux-x64-64bit.tar.gz” in your will be different due to version changes that I believe they will provide updates.
5. Now let’s open the tar.gz file, by executing the command:
tar xzvf softether-vpnserver-v4.34-9745-rtm-2020.04.05-linux-x64-64bit.tar.gz6. After extracting it, a directory named vpnserver will be created in the working folder. In order to compile SoftEther, the following tools and packages must be installed on your server: make, gccbinutils (gcc), libc (glibc), zlib, openssl, readline, and ncurses Make sure these are installed. You can install all the packages necessary to build SoftEther using the command below:
apt-get install build-essential -yOnce we have install build-essentials we can enter our vpnserver directory:
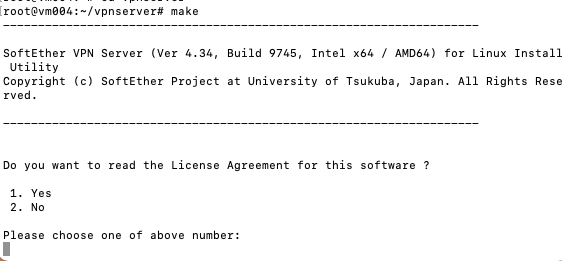
cd vpnserver7. And now run “make” to compile SoftEther into an executable file:
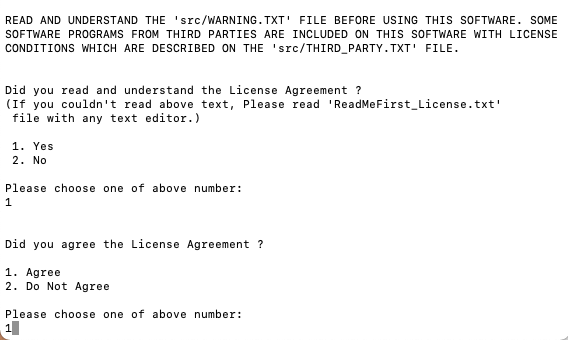
makeIt will ask you to confirm License Agreement press 1
Then it will ask you to confirm by reading it and press 1

Then it will ask you to confirm “Did you agree the License Agreement ?” it and press 1, and it will make installation.
8. Now exit the directory:
cd ..9. Now let’s move vpnserver folder to /usr/local/
mv vpnserver /usr/local && cd /usr/local/vpnserver/10. And then change the files permission in order to protect them:
chmod 600 * && chmod 700 vpnserver && chmod 700 vpncmd11. If you like SoftEther to start as a service on startup create a file named vpnserver in /etc/init.d directory and change it to the following:
nano /etc/init.d/vpnserverAnd paste the following into the file:
#!/bin/sh
# chkconfig: 2345 99 01
# description: SoftEther VPN Server
DAEMON=/usr/local/vpnserver/vpnserver
LOCK=/var/lock/subsys/vpnserver
test -x $DAEMON || exit 0
case "$1" in
start)
$DAEMON start
touch $LOCK
;;
stop)
$DAEMON stop
rm $LOCK
;;
restart)
$DAEMON stop
sleep 3
$DAEMON start
;;
*)
echo "Usage: $0 {start|stop|restart}"
exit 1
esac
exit 0
After that save the file Ctrl +x It will ask Save modified buffer? Press Y and then Ctrl +m
12. We have to make a directory at /var/lock/subsys if one does not exist:
mkdir /var/lock/ && mkdir /var/lock/subsys13. Now change the permission for the startup script and start vpnserver using command below:
chmod 755 /etc/init.d/vpnserver && /etc/init.d/vpnserver start14. Use the command below make it to run at startup:
update-rc.d vpnserver defaultsCongratulations you have a Working VPN server, now you need to make configuration for it and create new users.
For more information on how to configure a VPN server press here.